Imagej Macro
*Deprecated: Please see diSPIM Preprocessing*
Min Guo, Yicong Wu, and Hari Shroff, February 2016
Tutorial for using the image shifting macro, for diSPIM data acquired in stage-scanning mode
The image shifting macro imagei_macro.zip preprocesses diSPIM data acquired in stage-scanning mode before further analysis (e.g. deconvolution, segmentation etc.). The macro offers background subtraction, image shifting and automated region of interest detection in a graphical user interface for easy user interaction and review. The macro enables users to process both single-view (iSPIM) images and dual-view (diSPIM) images. Its main task is to transform the stage-scanning coordinate system into the more conventional coordinate system (stage stationary, light-sheet and detection plane swept through sample). In stage-scanning mode, the diSPIM moves the stage (and sample) at constant speed, but keeps the light sheet and detection objective stationary. The relative movement between the sample and detection lens leads to the following relationship between the two coordinate systems:
where are the coordinates in conventional mode and the corresponding coordinates in stage-scanning mode. To perform the inverse transformation, the macro shifts the acquired image stacks in the direction slice by slice, and sets the slice thickness to of the slice step in stage-scanning mode (i.e. a 45 degree relation between light-sheet and stage is assumed). Since background subtracted images sometimes show better contrast after joint deconvolution, the macro also provides multiple ways to subtract image background based on either background images acquired during an experiment or background information manually or automatically derived from the raw images. To save storage as well as speed deconvolution after image-shifting, the macro allows the user to crop the shifted stack and save the cropped result, thus reducing the final image size as much as possible. The macro first tests one time point to determine the cropping volume. During processing of this test time point, the macro detects a region of interest in the XY maximum intensity projection, and semi-automatically selects the slice range automatically. Based on this slice range, a cropped volume is generated and used as a benchmark for cropping volumes corresponding to all time points. The macro should work within Fiji that has ImageJ version 1.48c or later on a PC with the Windows 7 Professional operation system. We have also used it with good results within Fiji: Life-Line version, 2013 July 15, Windows 7 (64-bit).
Running the ImShifting macro:
1. Run ImShifting.ijm within Fiji
Download Fiji at http://fiji.sc/Downloads#Fiji
Open the macro with in Fiji and run it. Two windows will pop up: one dialog window for setting parameters and an additional log window (Fig. 1). 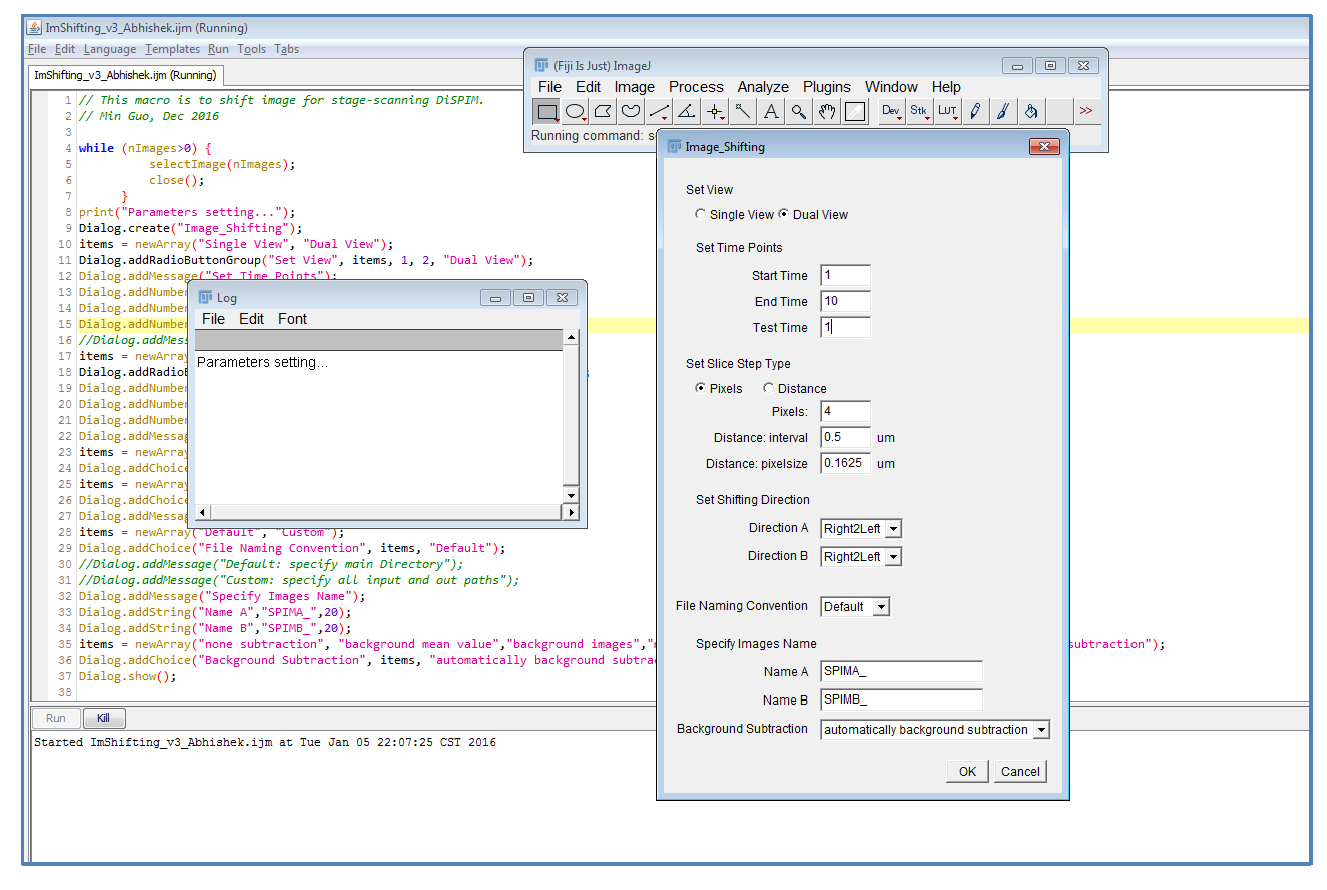
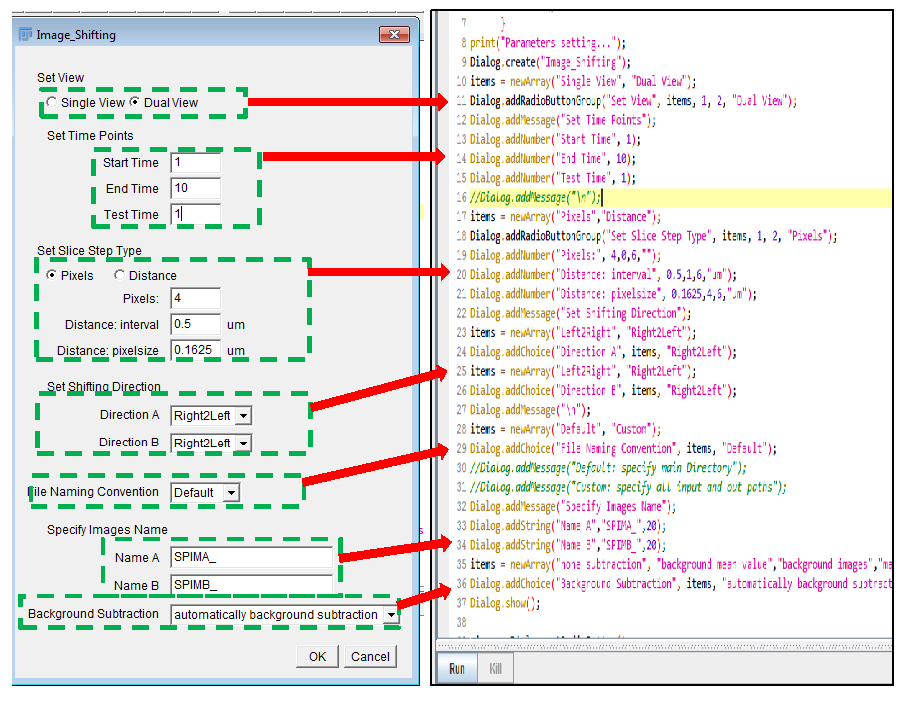
2. Set parameters Users need to specify all the parameters shown in the dialog window (Fig. 2 left), the default parameters are for our diSPIM configuration, but users can make their own default settings by modifying the parameters in the macro code (Fig. 2 right).
Set View: choose view(s) to process. The default set is “Dual View” for diSPIM system, but if “Single View” is selected, users don’t need to specify parameters for the second view.
Set Time Points: set the time range of the image volumes and the test image for selecting Region of Interest (ROI). If Test Time < Start Time or Test Time > End Time, the Start Time point is implicitly set as the Test Time point.
Set Slice Step Type: two options are provided, and parameters depend on the particular diSPIM stage motion.
• If the “Pixels” radio button is selected, the shifting step for each slice is specified by the image pixels: ; • Otherwise if the “Distance” radio button is selected, the shifting step of each slice is specified by both the stage step interval and the image pixel size: ;
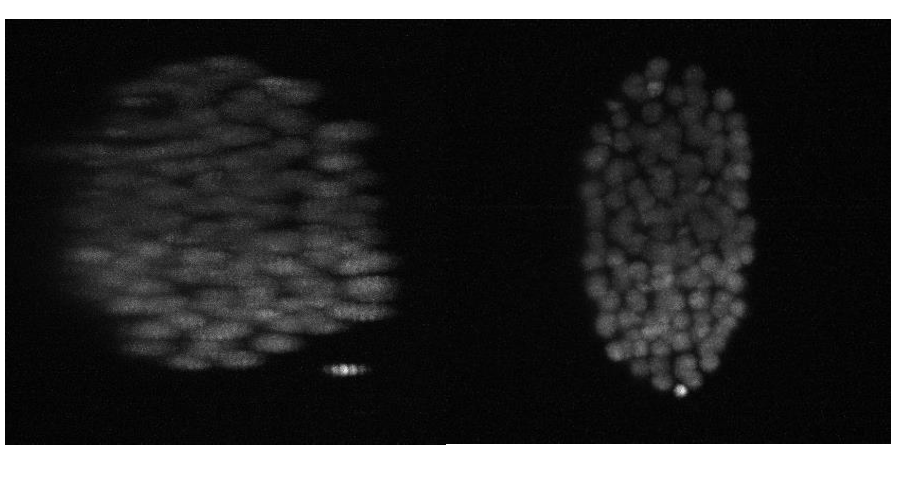
Set Shifting Direction: the shifting direction depends on the particular diSPIM’s stage setup and will affect the rotation direction for subsequent dual-view registration. The default shifting direction is specified for our diSPIM configuration, and may need to be modified by the user. If the input shifting direction is wrong, the maximum projection of the shifted image stacks is obviously blurred and distorted (Fig. 3). Once the correct shifting direction has been determined, the result should work for any imaging experiment unless the users change the diSPIM stage’s direction of movement.
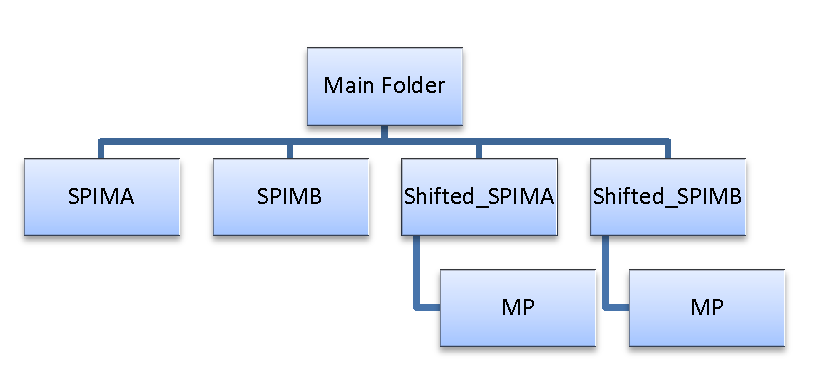
Set File Naming Convention: Both “default” and “custom” naming convention options are provided for datasets. We use a default naming convention shown in Fig. 4, but users may specify their own file and folder name system. Please see step 3 for more detailed information.
Specify Images Name: provide images name prefix. • If image data is saved in tiff stack format, the tiff stack name prefix should be set. For example, if the stacks’ names are SPIMA_1.tiff, SPIMA_2.tiff, SPIMA_3.tiff…, then “SPIMA_” should be set as the name prefix; • If image sequences are used as input, then image sequence folder name prefix should be set. For example, if sequence folder names are SPIMA1, SPIMA2, SPIMA… , then “SPIMA” should be set as the name prefix;
Background Subtraction: five options are provide for the background subtraction. Please see step 4 for more description.
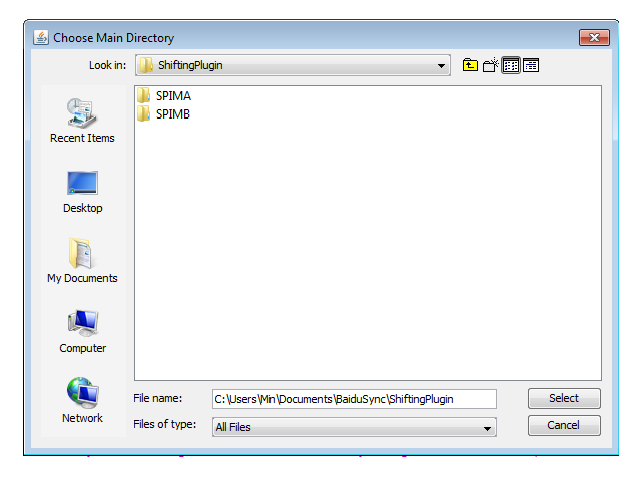
3. Specify folder directories After pressing the “OK” button of the dialog window, users need to set the directories for input and output: • If “Default” naming convention is selected, users need to specify the main input folder directory (Fig. 5). For example, In the default naming system, if SPIMA and SPIMB are set as the input directories, then Shifted_SPIMA and Shifted_SPIMB are created automatically as output folders. (If Single View is selected, SPIMA should be used as the only input folder.)
 • If “Custom” naming convention is selected, users need to specify all the input/output directories in the following order: A View input folder A View output folder B View input folder B View output folder
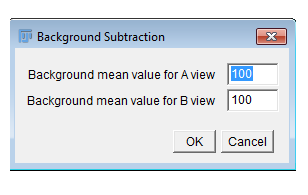
4. Background subtraction Five options are provided for background subtraction: none subtraction: no background subtraction will be used, i.e. users don’t need to take any action. background mean value: the program pops up a dialog (Fig. 6), and users need to specify the estimated average values of the background (typically the camera offset):
background images: the program will subtract the background, based on background images provided by users: • Open a background image for A View, then press “OK” button (Fig. 7 left); • Open a background image for B View, then press “OK” button (Fig 7 right);
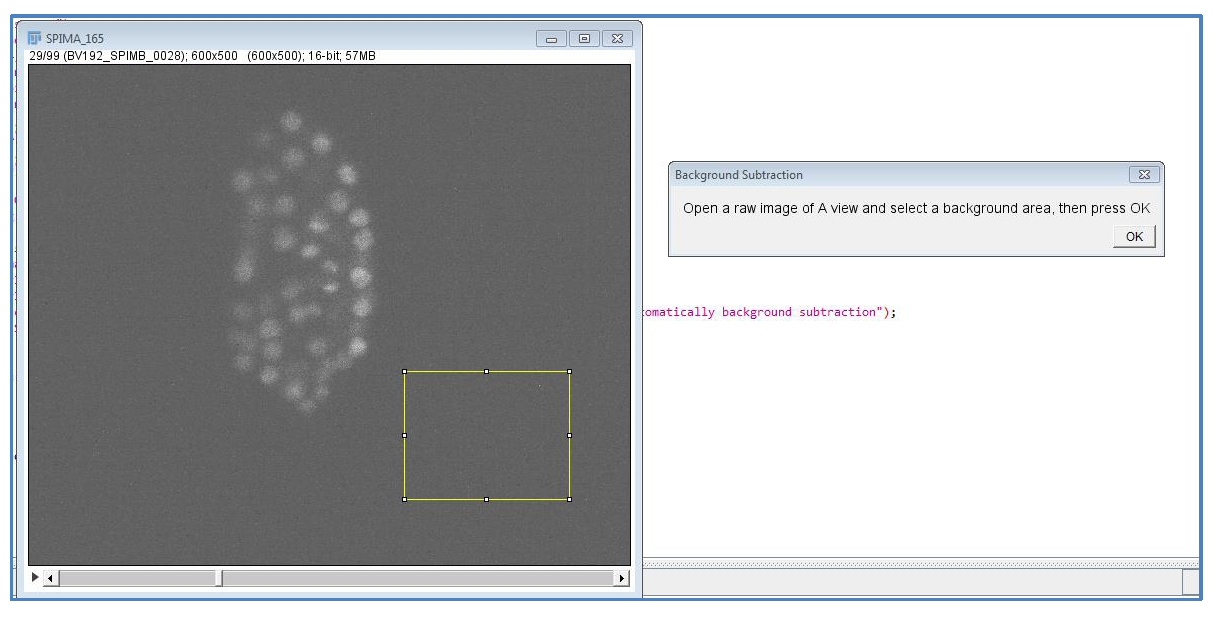
manually select background area: users are guided to select background areas of raw images, then subtraction is applied based on these selections. • Open a raw image of A View and select an area as background (Fig. 8); • Open a raw image of B View and select an area as background.
automatically background subtraction: the background is detected and subtracted automatically, i.e no user input is required. The macro assumes most of the image pixels are background, especially for the edge slices. In processing the test time point, it chooses the first slice and last slice (before shifting) and obtains their histograms. The histograms’ peak and its neighbors are regarded as background pixels whose weighted average is calculated as the background value.
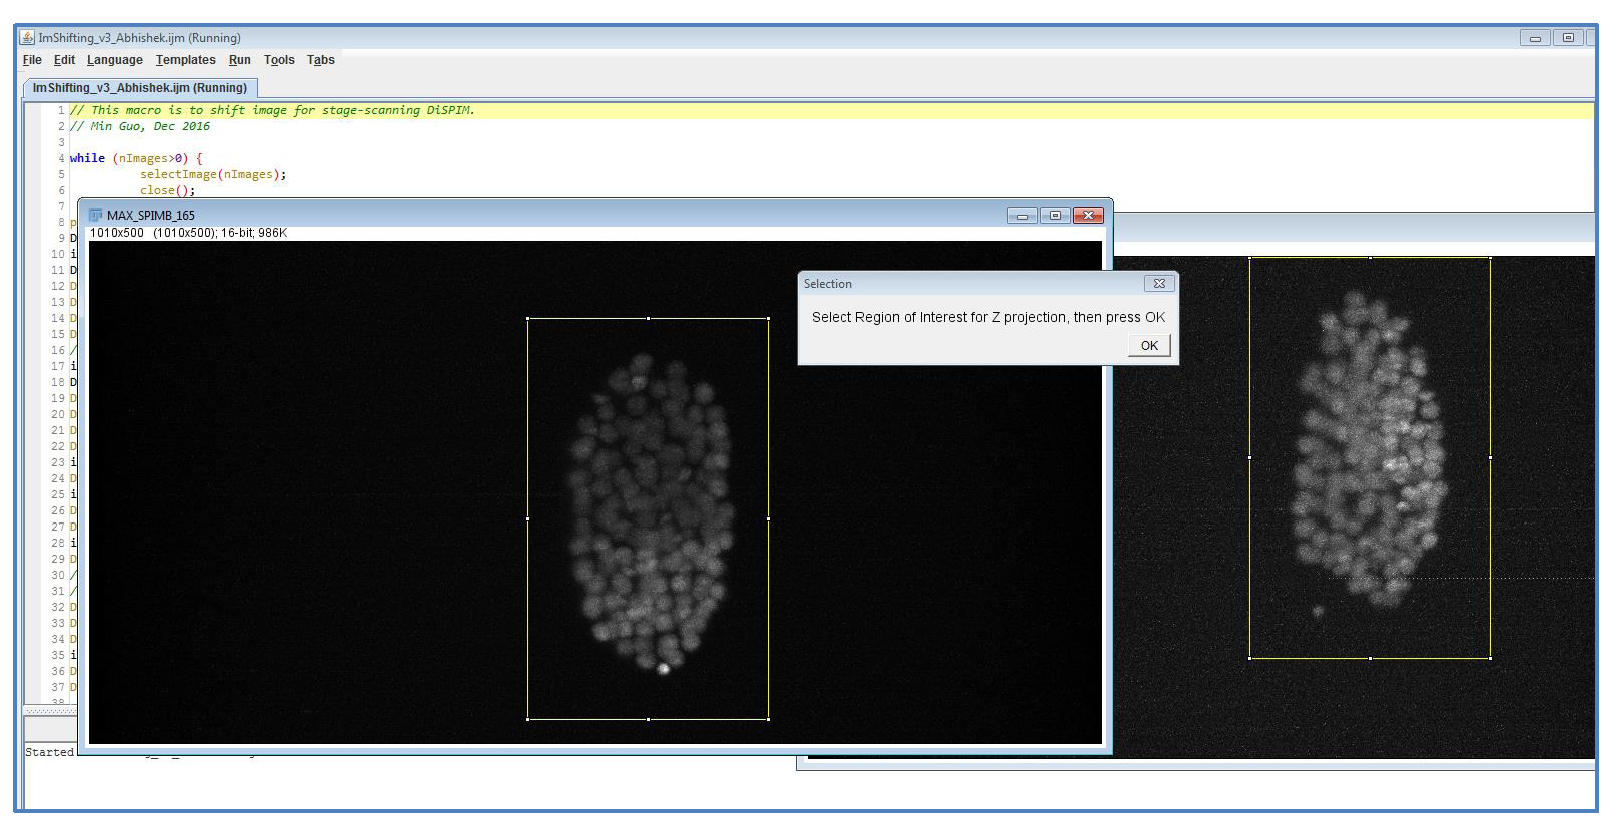
5. Select Region of Interest (ROI) The program pops up four image windows, and the selections are based on the two projection images.
• 2 ROIs will be automatically generated • The ROIs will be cropped and saved as outputs • If users want to modify the selections, please keep them same size for both views (important for subsequent deconvolution) • When modifying, use “ctrl+shift+E” to copy one selection to other view so that you can keep them the same size. (click window frame of the selection to copy from click window frame of the selection to copy to”ctrl+shift+E”move the selection to cover the ROI)
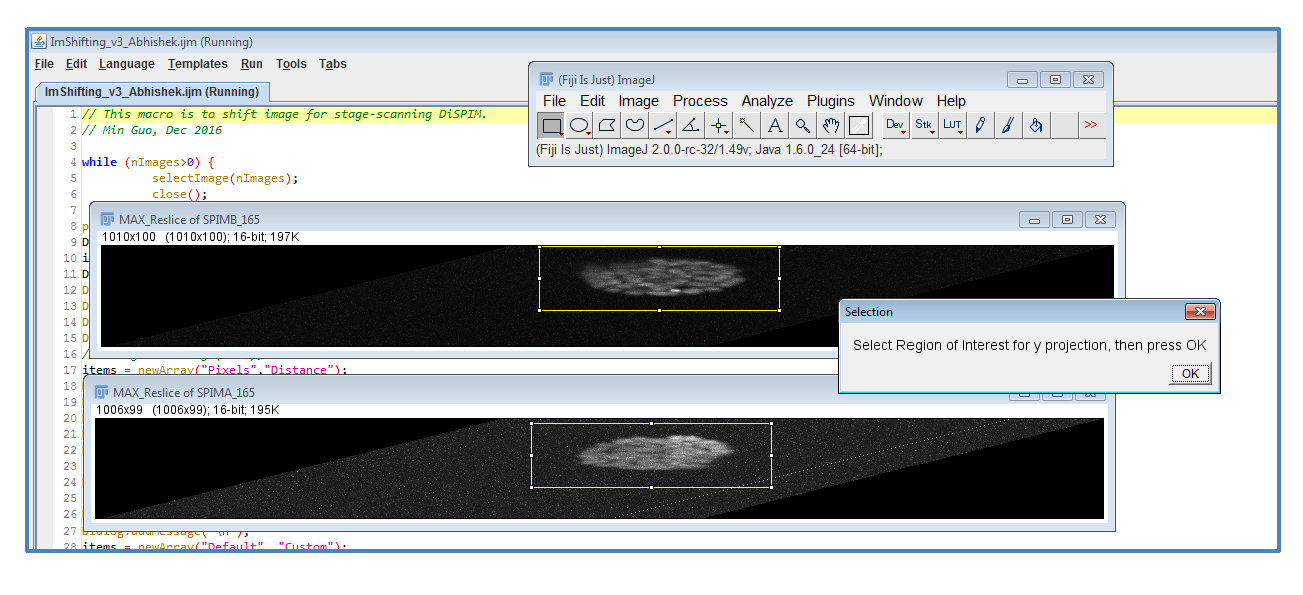
6. Select slice range We don’t input the slice range directly, but determine the slice range by detecting the ROI of the XZ maximum projection. Users need to select the ROI as in step 4.
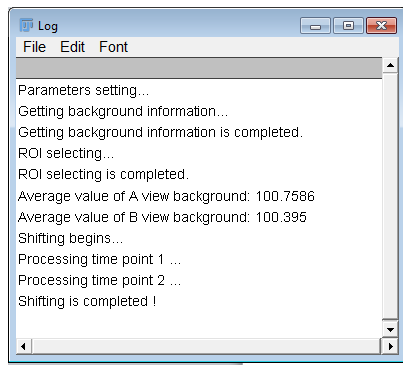
7. Batch Processing After selecting the slice range, background subtraction and shifting are batched, as shown in the log window (Fig. 11).
