Table of Contents
Assembly
The steps in this section are demonstrated in the following YouTube video: https://www.youtube.com/watch?v=TAgbr6IrTqw.
Attach the SPIM assembly to the microscope frame
The SPIM assembly is shipped separately and mostly assembled. The RAMM frame stand or the microscope mount assembly has two vertical arms on the back where 2 dowel pins each (total of 4) connect the microscope frame to the SPIM-MOUNT . Slide the complete SPIM assembly onto the dowel pins and fastened in place with the bolts provided (M8 thread with M6 Allen head). See Figure 1. If you need to set down the SPIM assembly, be careful not to rest it on the piezo objective movers (where the objectives will go) but instead tip it backwards and rest it on the arm and tube lenses to protect the piezos.
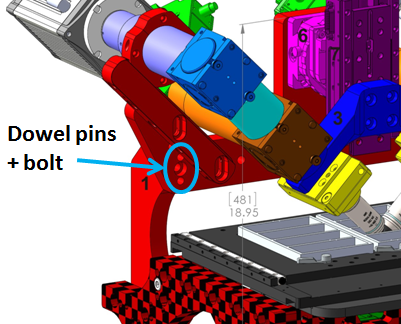 Figure 1: RAMM frame with SPIM assembly, showing location of dowel pins and bolts.
Once you have the SPIM assembly attached to the microscope frame, the next step is to add the scanners and cameras to the tube lenses using the C-mount adapters.
Attach the scanners
Locate the scanner tube lenses, C-mount adapters, and scanners. Attach the scanners to the C-mount adapters as shown in Figure [fig:Scanner-assembly]. If needed, attach the tube lens assembly to the lower MIM-CUBE-II using a 2 mm Allen wrench to secure the three set screws to the adapter ring. Originally a 15 mm spacer was used, but a 7.5 mm spacer is generally preferred.
On a few early systems the scanner tube lenses were fixed to the frame, similar to the camera tubes, instead of being fixed to the cubes. This is no longer recommended. Some hardware changes may be required to retrofit to the recommended configuration with the scanners fixed to the filter cube; contact ASI for details.
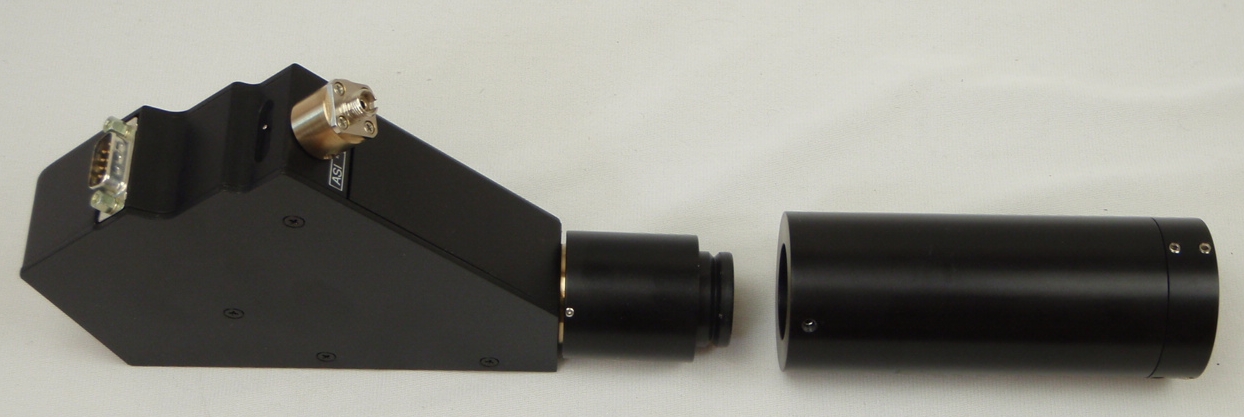 Figure 2: Scanner attached to C-mount adapter with tube lens assembly ready to be installed.
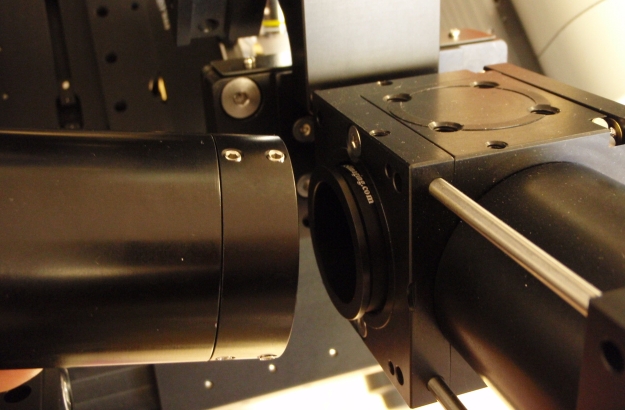 Figure 3: Tube lens assembly is attached to lower cubes on the microscope.
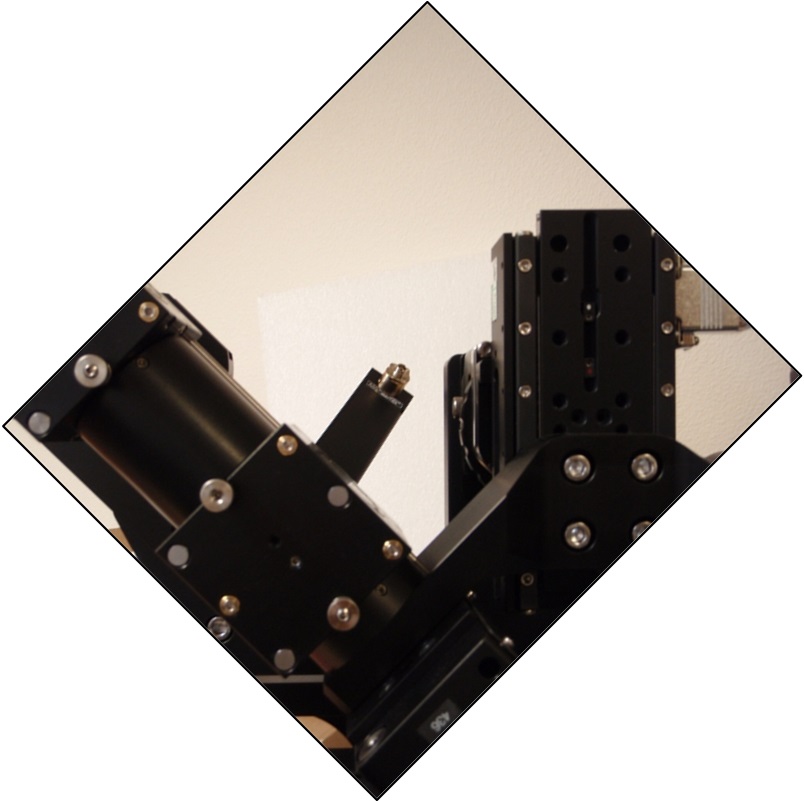 Figure 4: Scanner attached at C-mount with poor alignment
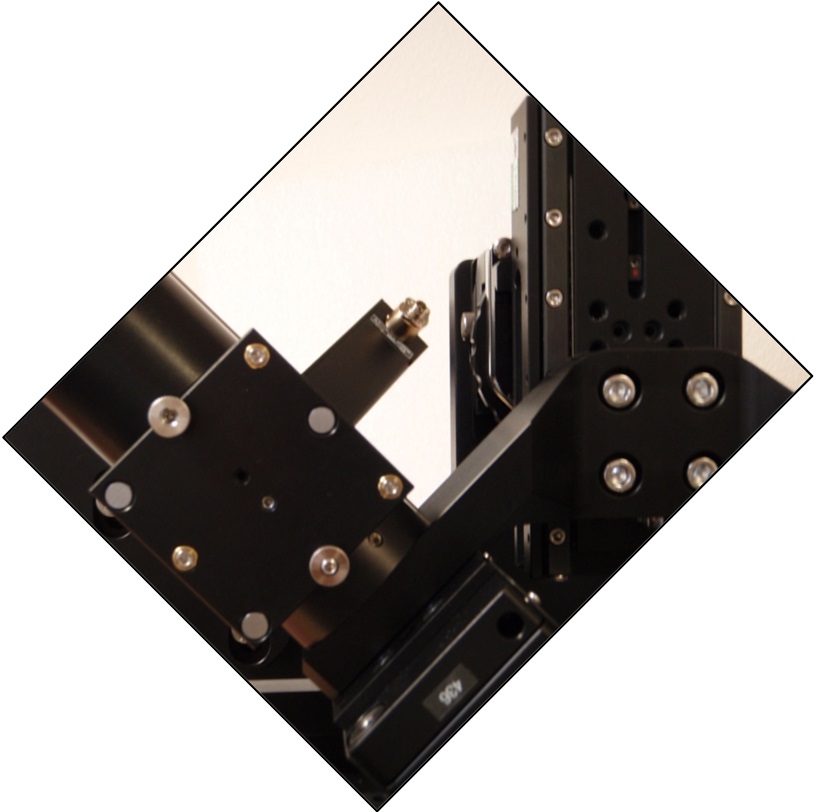 Figure 5: better alignment
The scanners should be attached so the fiber connectors are facing upwards and in toward the center at a 45 degree angle as shown in the figures. In other words, the scanner assembly is aligned parallel / perpendicular to the MIM-CUBE-II. Be sure all of the set screws on the lens tubes, cubes, and C-mounts that hold the scanners are snug and the that scanners cannot wiggle around on the mount. Coarse rotation of the scanner is best done by loosening the set screws between the tube lens and C-mount adapter. Fine rotation can be done by grasping the tube lens and turning it (the threads of the lens assembly will slip some, allowing the tube body to rotate relative to the end of the tube lens near the lens.
Attach the cameras
The camera tube lenses are fastened to the SPIM-MOUNT with a pair of ring clamps that clamp the tube lenses to the frame. The end of the lens tubes should come to within about 1mm from the mirror cube on the SPIM arm. This allows the entire objective pair assembly to be moved up and down for focus without needing to move the cameras. When the objectives are lowered into position for viewing a sample, the camera tube lenses assembly can be adjusted so that the tube lenses are centered on the mirror cube. Two M8 Allen head bolts hold the lens tube support arms to the frame. By loosening those bolts it is possible to adjust the position of the lens tubes to be centered on the mirror cube.
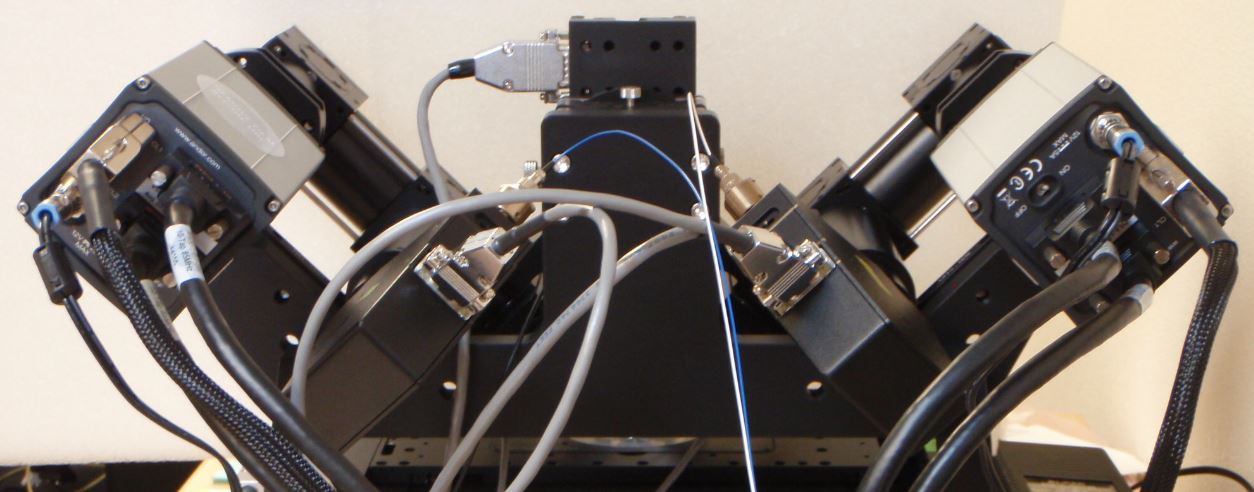 Figure 6: Scanners and Andor Zyla cameras installed in conventional orientation.
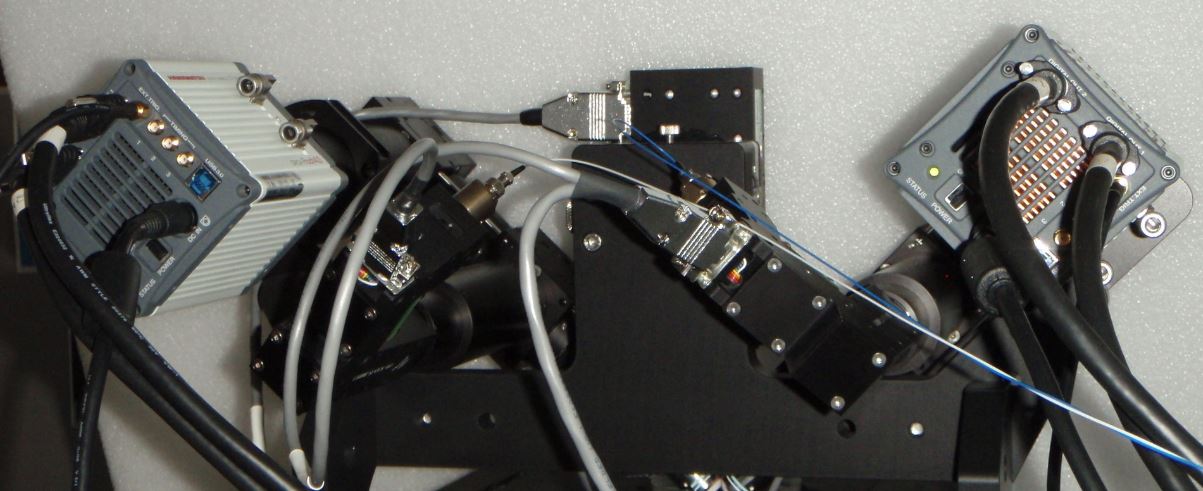 Figure 7: Scanners and Hamamatsu Flash4 cameras installed in conventional orientation.
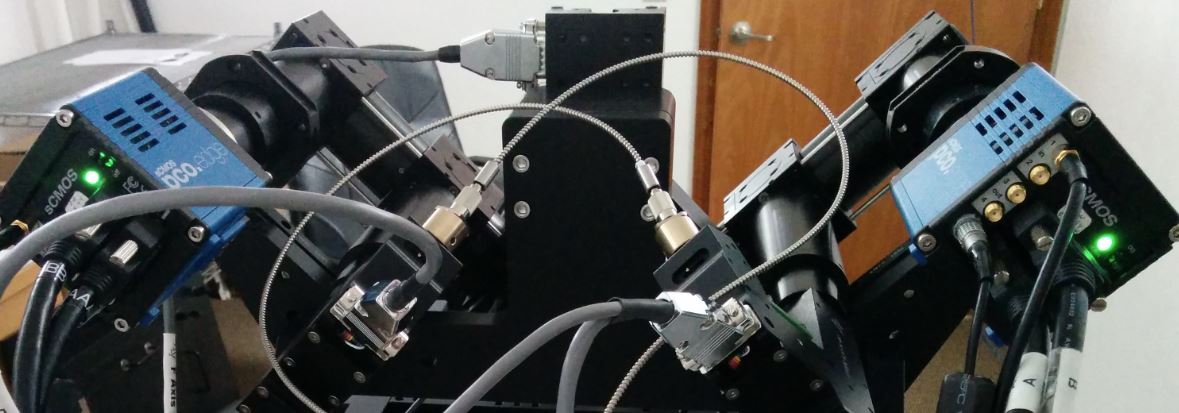 Figure 8: Scanners and PCO Edge cameras installed in conventional orientation.
Camera orientation
The user has a choice of camera orientation. Although other choices are possible, our convention1) is to have the image of the illuminating sheet laser beam appear horizontal with the laser coming from the right objective appearing as coming from the right side of the left-side camera image and vise versa for the opposite objective.2) Figure ## shows the Micro-manger MultiCam image of the light sheet lasers entering a dye solution when the cameras are positioned as recommended. 3)
For the laser to appear horizontally, the cameras need to be tilted at 45 degrees from vertical. Figures Figure 6, Figure 7, and Figure 8 respectively show Andor Zyla, Hamamatsu Flash4, and PCO Edge cameras oriented in the conventional way.
 Figure 9: Laser beams seen by cameras in conventional orientation. The green image is from the left-side camera and shows the beam from the right-side scanner entering from the right and eventually stiking the coverslip where it stops. The red image is from the right-side camera, shows the beam from the left-side scanner entering from the left. The bright spots are the epi-fluorescent excitation from the scanner on the same side as the respective cameras. The following statement will be understood after going though the alignment: the objective lateral alignment is perfect because the epi and beams exactly overlap, but the camera mirrors need to be adjusted slightly to put both epi spots in the image center.
Insert the objectives
The method for inserting the objectives was significantly simplified in the piezo mounting scheme introduced in early 2015. Older systems can be upgraded with the new piezo mounting scheme. The main benefit of the new scheme is eliminating the AOA objective adjuster, replacing it by a smooth linear stage, which greatly eases objective alignment. In the new scheme the piezos easily slide out of the arm for easy exchange and cleaning of objectives. The linear adjuster is fixed instead of being moved by the piezo, improving speed slightly. Finally, the bushings include teflon glides to keep them snug.
Refer to the appropriate section to insert your objectives.
With pre-2015 piezos
At one point ASI recommended screwing in the objectives one at a time, retracting the objective bushings fully to make space, and subsequently returning the bushings to the desired position. However, to lessen mechanical stresses on the piezo actuators, ASI now recommends assembling the objective with bushing and piezo objective mover (and lateral adjuster if present) separately from the microscope and then attaching it to the SPIM arm mount. This way the objective bushings do not need to be retracted beyond their normal travel, nor do you risk damaging the objective threads as you begin screwing it in slightly off-axis.
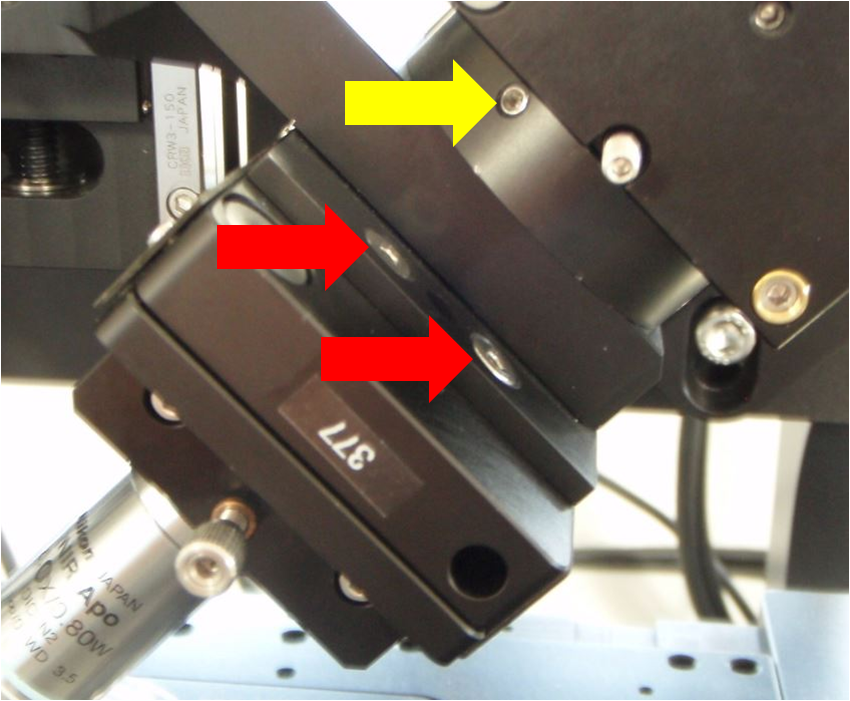 Figure 10: Close-up view of the screws holding the lower cube and rest of SPIM arm to the arm mount (yellow arrow) and also the screws holding the piezo objective mover to the SPIM arm mount (red arrows)
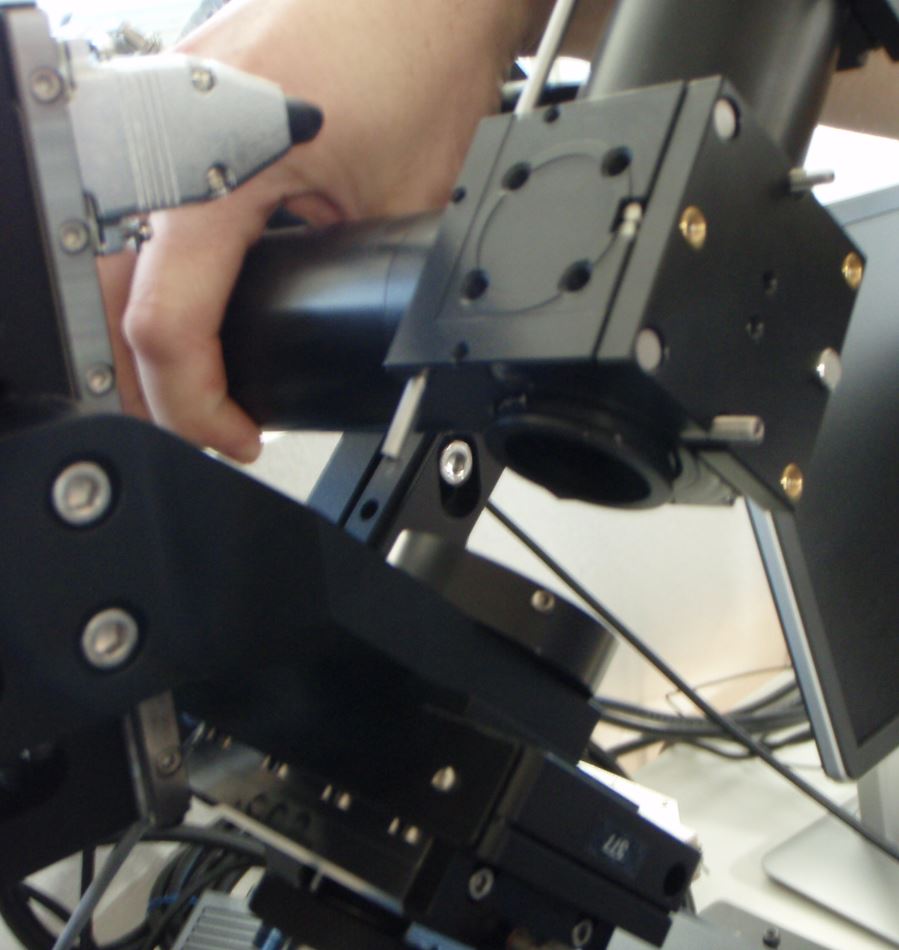 Figure 11: Separating the SPIM arm from the mount
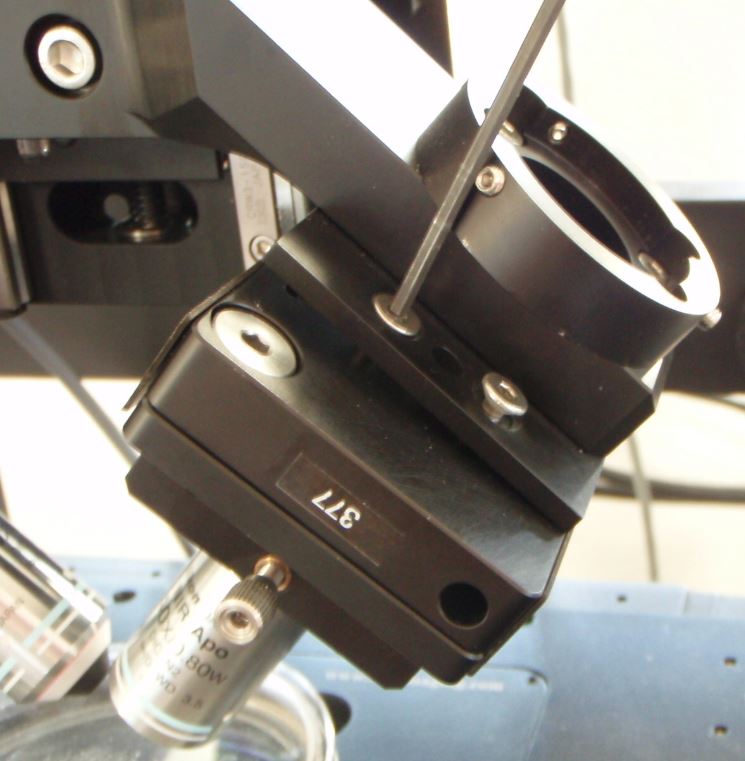 Figure 12: loosening or removing the screws holding the piezo objective mover to the SPIM arm mount.
Begin by removing one SPIM arm, intact, from the arm mount so you can access the screws connecting the piezo objective mover to the arm mount. It does not matter which side you remove. On the arm that you will remove, detach the electrical connector to the scanner along with its fiber optic cable. Loosen the three set screws around the ring connecting the arm mount to the bottom cube (labels 3 and 9 in Figure 1 of overview, or the screw marked with a yellow arrow in Figure [fig:Piezo-screw-closeup]a). After loosening the set screws you may need to pull slightly on the SPIM arm to disengage the support dowel between the lower cube and the arm mount. Note that the SPIM arm is heavy. Gently set it aside.
Next remove the piezo objective mover (APZOBJ) from the SPIM arm mount as shown in Figure 12. Loosen the four screws made accessible by removing the SPIM arm; these are the screws marked with red arrows in Figure 10. It is possible to fully remove the piezo objective mover and everything attached to it from the arm mount, but usually it is sufficient to simply loosen the 4 screws. Next, insert the objective into the bushing on the loosened piezo objective mover. Make sure the bushing is appropriately tightened; the nominal spacing between the objective bushings and the piezo or fixed mount is 5 mm on both sides, which means about 6 mm of bushing thread goes into the APZOBJ or PZMAG-AOA . The objective bushings (RAO-0004 and RAO-0023) thread into their respective piezo device or translatable mount in a smooth but snug fashion. Newer objective bushings have Teflon glides to keep them snug; the earlier version can be retrofitted with judicious use of Teflon (plumber’s) tape. ASI no longer recommends using the lock nut provided with early SPIM systems. The gap between the objective bushings and the piezo or fixed mount should be about 5 mm on both sides (about 2 mm if you have the lock nut installed).
If needed, now is the time to insert the objective on the other side of the diSPIM. It is easy to access the side of the diSPIM that was left intact now that much of the other side is removed (if needed you can raise the upper Z stage).
Re-attach the piezo objective mover with objectives by screwing it into the SPIM arm mounting plate. Finally, reattach the SPIM arm to the arm mount.
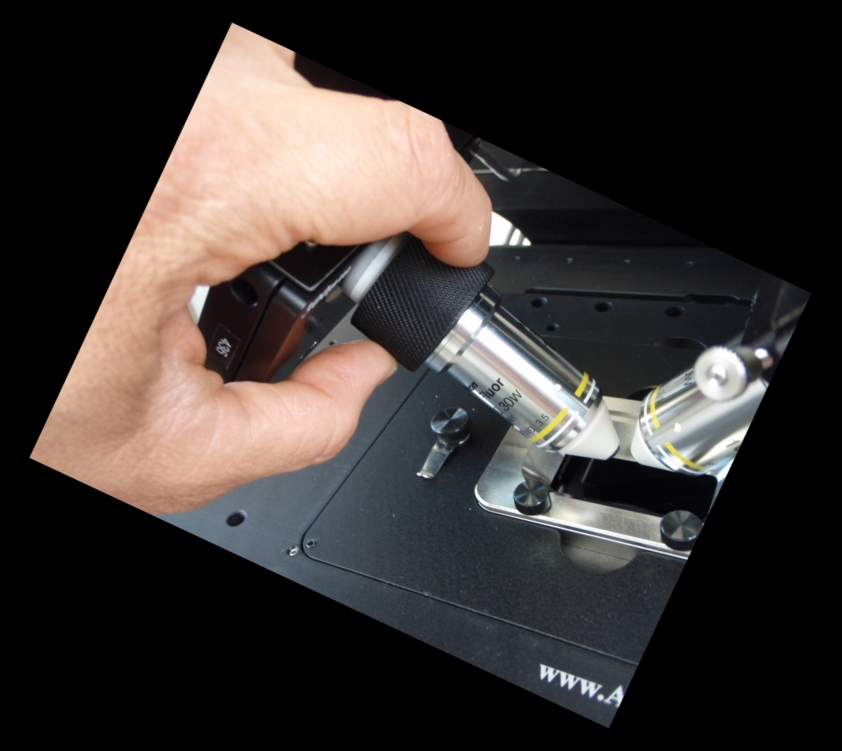 Figure 13: Left objective focus bushing
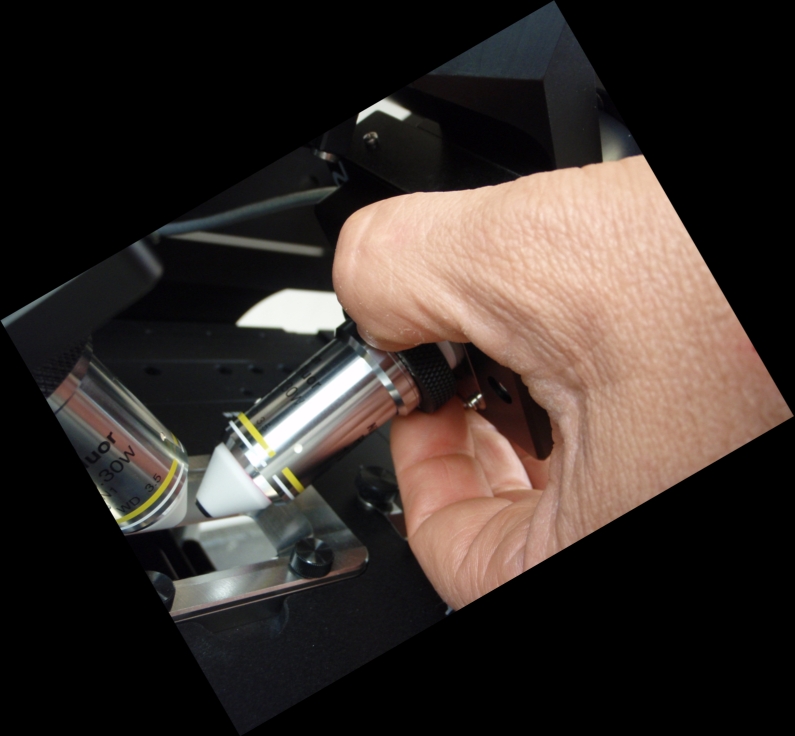 Figure 14: Right objective focus bushing
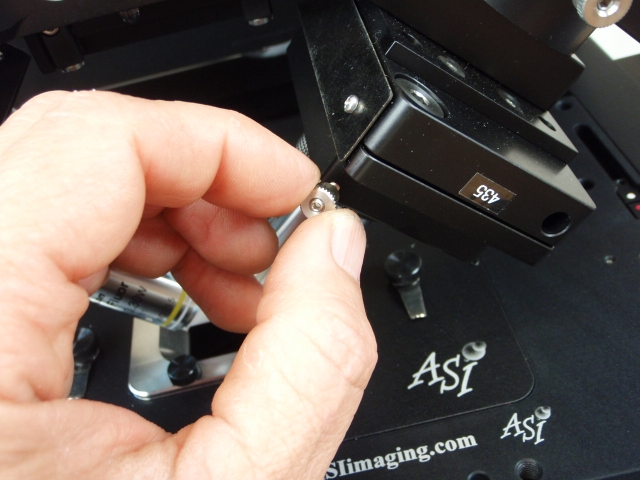 Figure 15: Lateral objective adjustment screw. The vertical objective position adjuster
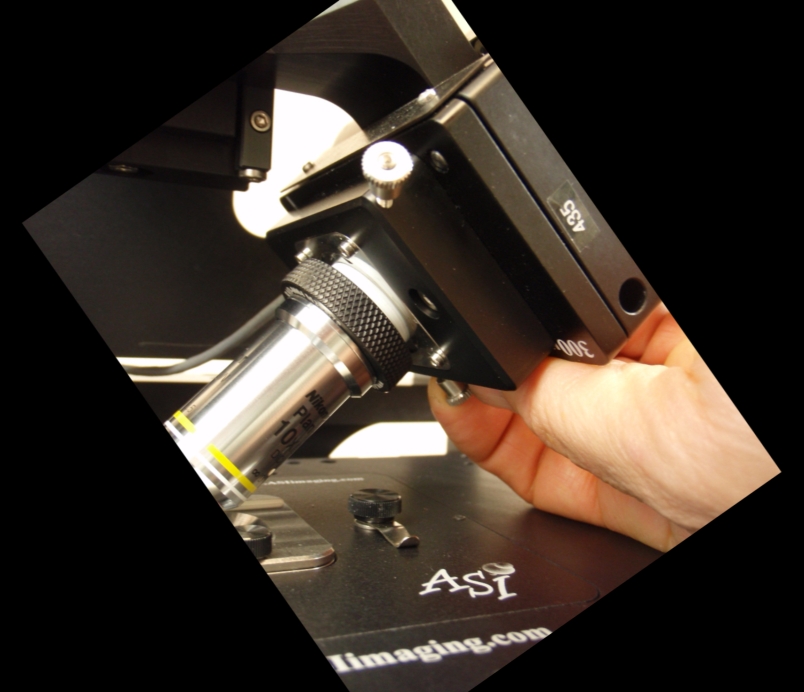 Figure 16: The vertical objective position adjuster is used mainly to lower the objective when changing lenses. Its effects are similar to the left objective focus bushing, and hence redundant
With everything reassembled, get the two objectives aligned (co-focused) “by eye” as best as possible using the bushings and the objective adjusters. For two Nikon 40x NA0.8 3.5 mm WD objectives, the gap between objectives is between 0.2 and 0.5 mm. Use the adjusters shown in Figure [fig:Three-orthogonal-objective] to move the objectives into position until they are visually symmetric from the front of the microscope and aligned forward and backward as well, as shown in Figure 17.
We recommend avoiding use of the vertical objective position screw (Figure 16) after the objectives have been aligned by eye. Make the vertical adjuster screw is not loose but also not so tight that the lateral adjustment is impossible. Because the lateral and vertical position adjusters are coupled you may need to work the screws against each other.
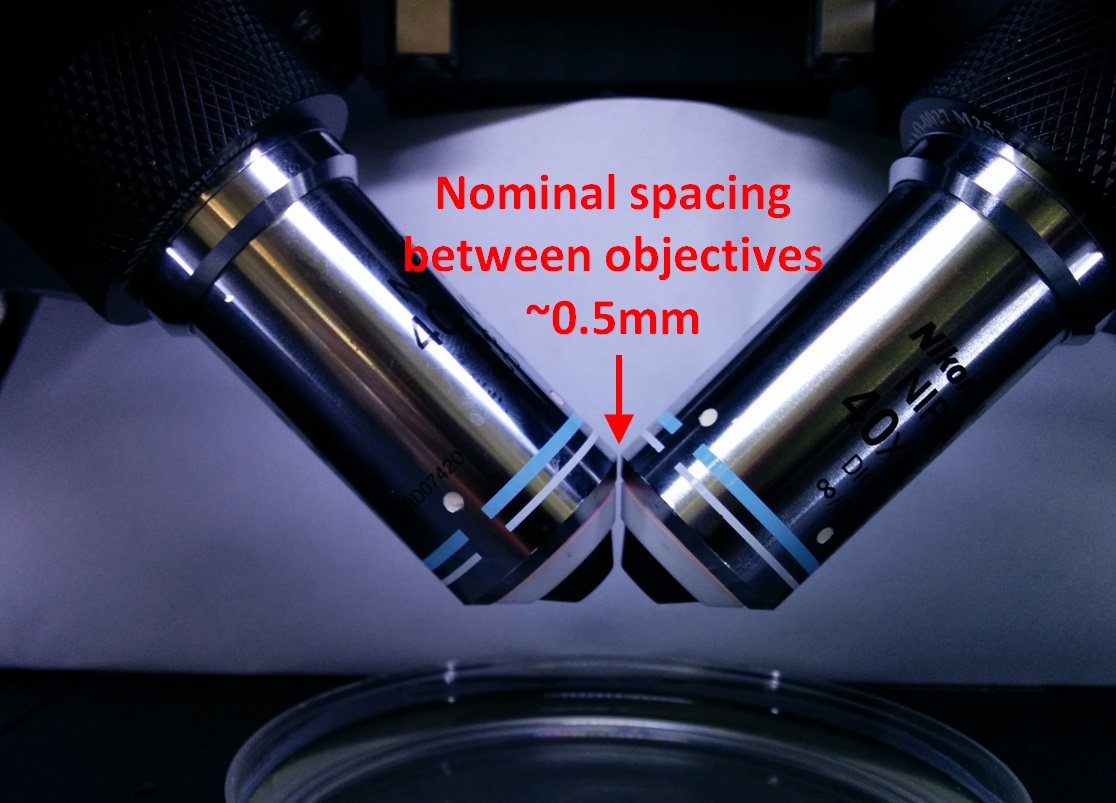 Figure 17: Close-up view of the two objectives when aligned.
In further adjustments we will move the objective focus bushings on both sides to focus and manipulate the right objective laterally using the lateral objective screw (Figure 15).
With 2015 piezos
Inserting the objectives is significantly easier with the 2015 piezo mounting scheme. The piezo actuators and everything attached to them slide in and out of the SPIM arm mount (RAO-0046 ) using a dovetail mechanism. A new lateral fine adjuster sits between the piezo objective mover and the SPIM arm mount. The objectives are brought into co-focus in 3-dimensional space by three orthogonal adjustments: the lateral adjuster and screwing or unscrewing the two objective bushings into the piezo top plate.
![Set screw location for loosening the piezo assembly from the SPIM arm mount.[fig:Set-screw-location] Set screw location for loosening the piezo assembly from the SPIM arm mount.[fig:Set-screw-location]](http://dispim.org/_media/docs/manual/piezo_dovetail.png?w=300&tok=3745e2) Figure 18: Set screw location for loosening the piezo assembly from the SPIM arm mount.[fig:Set-screw-location]
Figure 18: Set screw location for loosening the piezo assembly from the SPIM arm mount.[fig:Set-screw-location]
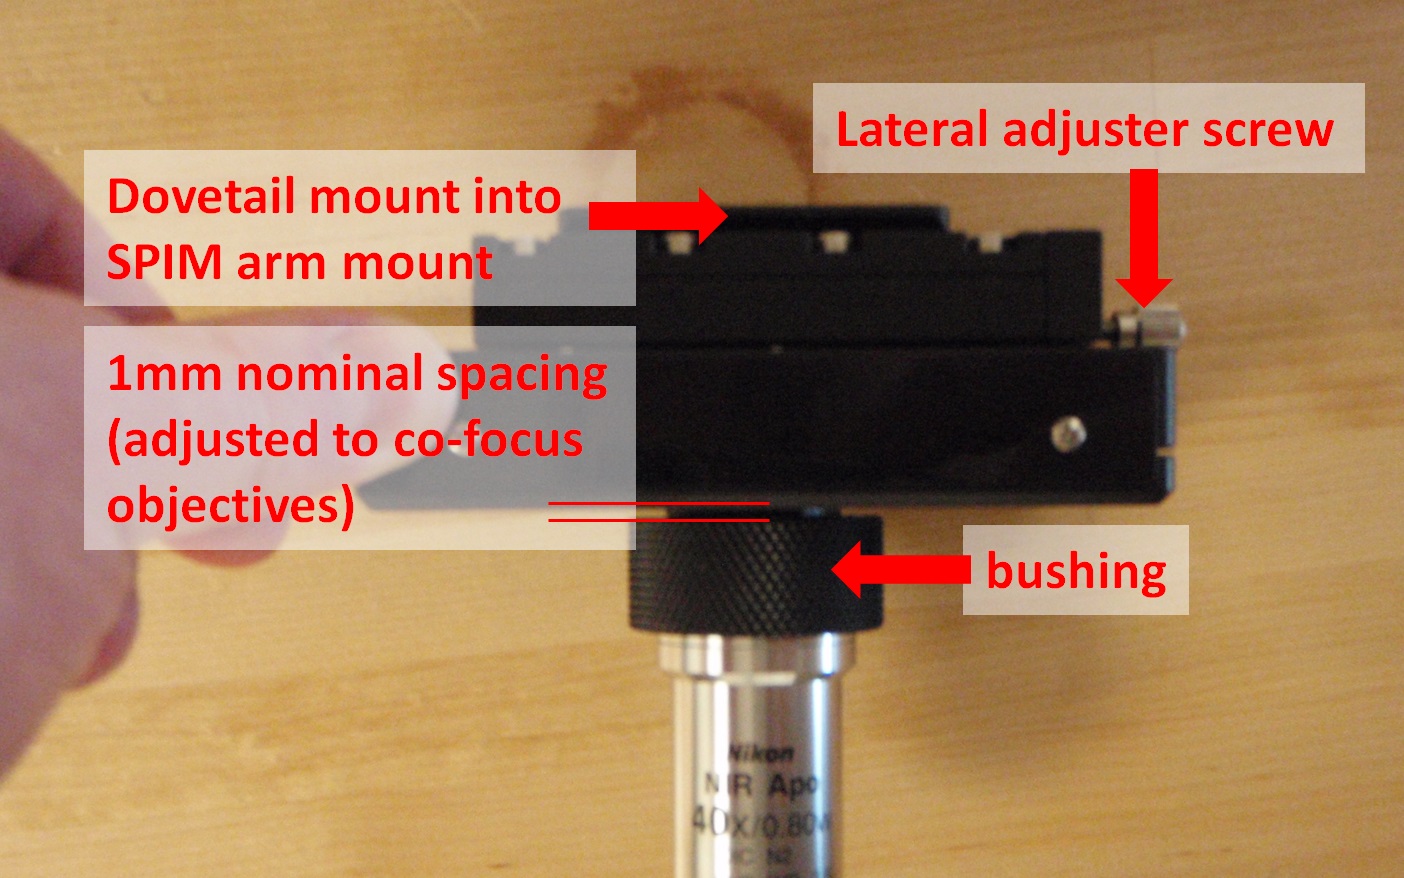 Figure 19: 2015 piezo objective mover with lateral adjuster.
To remove the piezos from the SPIM arm mount, first loosen the set screw on the bottom of the arm mount; it is the center screw of the three on the side of the SPIM arm mount as shown in Figure 18. This set screw secures the dovetail joint in place. Once the set screw is loosened, the lower (male) side of the dovetail slides out of the arm with a firm pull. Once the dovetail is separated it is easy to insert, remove, or clean the objective (see Figure [fig:2015-piezo-objective]). Both sides of the arm mount have the same mechanism, though it may only be necessary to remove one side.
Upon re-insertion, the dovetail will “click” into position and then the set screw should be tightened.
With the objectives inserted and everything reassembled, get the two objectives aligned (co-focused) “by eye” as best as possible using the bushings on both sides and the lateral adjuster. When aligned, the objectives will be symmetric when viewed from the front of the microscope and aligned forward and backward as well, as shown in Figure 17.
Care of piezo objective movers
The piezo objective movers are the most failure-prone component of the diSPIM system. It appears that the piezo actuators can be damaged by external stresses, including as screwing the objective bushings in so far that the piezo top plate is moved mechanically (impossible with 2015 piezos or more recent; for older systems be sure to follow the instructions in Section [sub:Insert-the-objectives-2014]), crashing into the sample chamber, or resting the SPIM assembly on top of the piezo objective movers when assembling the microscope. As a general rule, be careful not to apply external mechanical force on the piezos.
During normal use the piezos are also stressed electronically. Because the electronic stress scales quadratically with applied voltage, being in the extreme negative position (near the sample) wears out the piezo faster than using the piezo near the center position. Of course electronic stresses are part of normal operation, but if the diSPIM is not being used for a long period of time then we recommend either turning off the Tiger controller or else using the command to disable the piezo axes (this reduces the applied voltage to even less than the center position). In Micro-Manager this can be done easily using the “MotorOnOff” property of the piezo stages, setting its value to be “On” in the System-Startup configuration preset and “Off” in the System-Shutdown preset (see the Micro-Manager Configuration Guide). Then simply turning off Micro-Manager suffices to put the piezos in a good long-term state. When cared for properly we expect most piezo objective movers to last much longer than the one-year warranty period.
As of December 2014 we recommend 150 um travel piezo objective movers with increased flexure width, which reduces the tendency for side-to-side vibration of the piezo top plate in response to other vibrations (e.g. from the camera fans or imperfect isolation from the floor).
Tiger Controller
The motion components of the diSPIM microscope are controlled by ASI’s modular Tiger controller. The controller should be located near the microscope such that all cables reach and so that the indicator lights on the face of the control units can be seen easily.
![Tiger Controller[fig:Tiger-Controller] Tiger Controller[fig:Tiger-Controller]](http://dispim.org/_media/docs/manual/tiger.jpg?w=300&tok=3270be) Figure 20: Tiger Controller[fig:Tiger-Controller]
Figure 20: Tiger Controller[fig:Tiger-Controller]
A typical diSPIM controller contains the following modules:
TG/COM
Communications card with USB connection to host computer. Supports four-axis joystick/knob pod.
X/Y
Two-axis XY stage card. Also supports a dimmable LED illuminator.
Z/F
Two-axis card for SPIM focus (F) and lower microscope focus control (Z). May also have an LED illuminator.
MICRO-MIRROR
Four-axis micro-mirror controller card. Controls two standard light sheet scanners, or a single scanner with anti-striping micromirrors. Control logic for synchronizing the light sheet, camera triggers, and piezo motion resides on processor in this unit.
TTL / PLC
TTL buffer card or Programmable Logic card outputs lasers and camera control signals.
PIEZO P
P-axis objective piezo positioner card.
PIEZO Q
Q-axis objective piezo positioner card.
Connecting cables
Cables to all components are labelled. On the diSPIM there are identical cameras scanners and piezos on both sides so it is important to keep straight which cables go where so that the control software can work as intended.
Tiger Controller
As a safety precaution the Tiger controller should always be powered off when connecting or disconnecting cables.
Install all motion control cables to the appropriate Tiger controller module. Be careful that X/Y and Z/F cables are not interchanged. Check serial numbers on the piezo objective movers and controller face-plates to be sure to connect the cables to the correct controller module.
Connect the Tiger USB connection to the host computer. If the USB to serial driver doesn’t install automatically, get it from http://www.silabs.com/products/mcu/Pages/USBtoUARTBridgeVCPDrivers.aspx.
Programmable Logic Card (or TTL) Card Connections
The Programmable Logic Card, or PLC, was introduced in 2015 and is used for the TTL control of the cameras and lasers. Its outputs are generally connected as follows:
- Path A camera trigger (right-side camera)
- Path B camera trigger (left-side camera)
- Not connected (can be configured as global shutter or ongoing acquisition signal)
- Laser side select
- Laser #1 on/off
- Laser #2 on/off
- Laser #3 on/off
- Laser #4 on/off
Which lasers are #1–4 does not matter, because the mapping between PLC output and a user-defined label is specified in software. In Micro-Manager, define presets using the property “OutputChannel” of the PLogic device (a shutter).
If you have a TTL card (non-upgraded systems shipped in 2014 or earlier), CAM0 and CAM1 are for camera triggers of paths A and B respectively. LSR0 is for the laser on/off control, and LSR1 corresponds to the laser side select. LSR0 and LSR1 may be connected differently if you have a non-standard laser configuration; contact ASI if you need more information.
Light Path A Component Connections
- Left-side scanner is connected to cable end marked BA.4)
- Right-side imaging piezo P is connected to the P-axis Piezo card.
- Right side camera Trigger is connected to PLC #1 (CAM 0 on the TTL card).
Light Path B Component Connections
- Right-side scanner is connected to the cable end marked DC.
- Left-side imaging piezo Q is connected to the Q-axis Piezo card.
- Left-side camera Trigger is connected to PLC #2 (CAM 1 on the TTL card).
Cameras
Install the camera cards in the host computer according to the manufacturer’s instructions, taking care to install any appropriate drivers along the way. In some cases, drivers need to be copied into the Micro-Manager install directory, consult the Micro-Manager wiki or manufacturer’s instructions for details.
Connect the camera data cables to the camera cards in the computer. The camera trigger cables should be connected as described.
Laser and Fiber Installation
There are many possible laser configurations that are theoretically supported. A bare-bones approach uses a single fiber coupled laser which is split with a fiber splitter into two outputs for the two scanners. In this configuration both output fibers have light simultaneously. The scanners act as imperfect shutters (~0.1% transmission) when steered to their blanking position.
More commonly, users have a laser merge module with dual outputs which controls of multiple laser lines and includes a routing switch that will direct the laser output one of two output fibers. The outputs on the TTL or PLC cards control the lasers. For a single-color setup, connect the TTL laser on/off control to LSR 0 and the fiber-switching signal to LSR 1 on the TTL card. For control of multiple laser lines, the PLC card is required. Generally PLC outputs #5-#8 are connected to the respective laser on/off controls and #4 is connected to the fiber-switching input.
Install filters, Filter cubes and Mirrors
Dichroic mirrors, emission and excitation filters should be installed in the C60-D-CUBE for each SPIM arm. Similarly, install the right angle mirrors for the camera tubes in the appropriate cubes. Details are shown in Figure 21.
Remove the two thumbscrews the hold the front dovetail mount, C60-DOVE-II , in place. Give a slight tug and twist so the magnets holding the part in place will release the cover assembly from the cube body. Remove the dovetail mount section from the MIM-CUBE-II’s covers as shown in Figure 22. After installing the filters and/or mirrors according to the manufacturer directions, reinstall the internal cube on the dovetail and then reinstall assembled adjustable dovetail mounts, with their appropriate filter cubes or mirrors, on the microscope. Be sure the three kinematic adjusters engage their seats. Press the three magnet buttons to engage the hold-down magnets. Replace the thumbscrews and lightly tighten them.
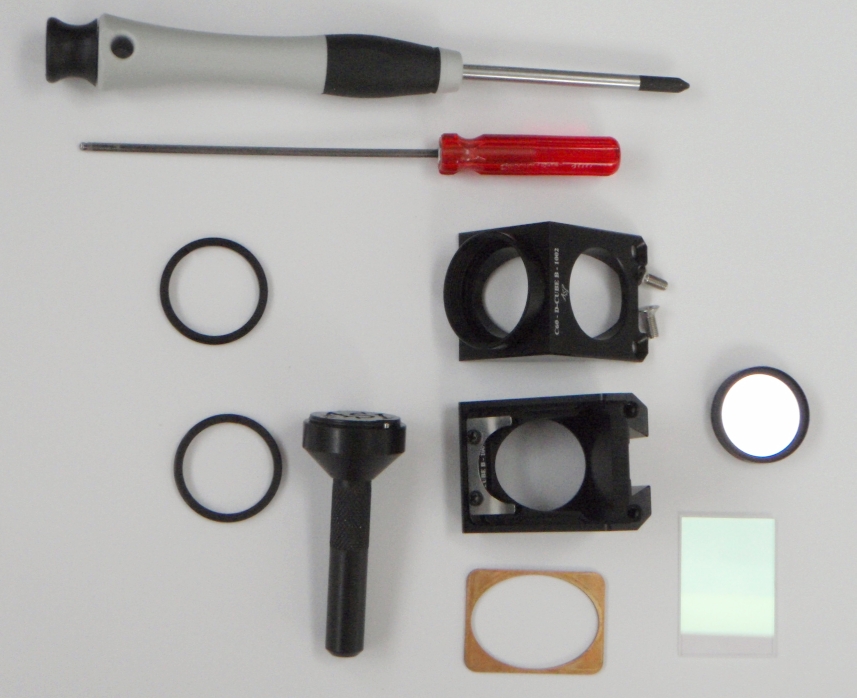 Figure 21: Internal filter cube, C60-D-CUBE, shown disassembled and ready for filters. Use the bronze spacer behind the dichroic mirror if using 1 mm thick mirrors. It is very easy to warp mirrors. Barely tighten the mirror retaining clip screws.
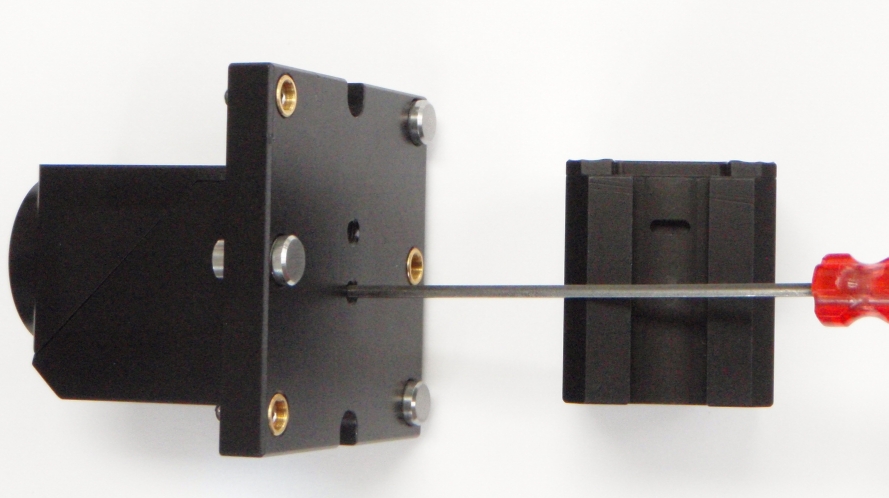 Figure 22: Cube installed on the C60-DOVE-II adjustable cube dovetail mount. There are two set screws on the dovetail mount. One has a small cam end that engages a slot in the internal cube. Align the filter cube slot with this screw and tighten until the cam engages the slot. The cam will allow the cube to be moved slightly up and down. Place in the neutral position and tighten the nylon-tipped set screw to hold the cube in place.
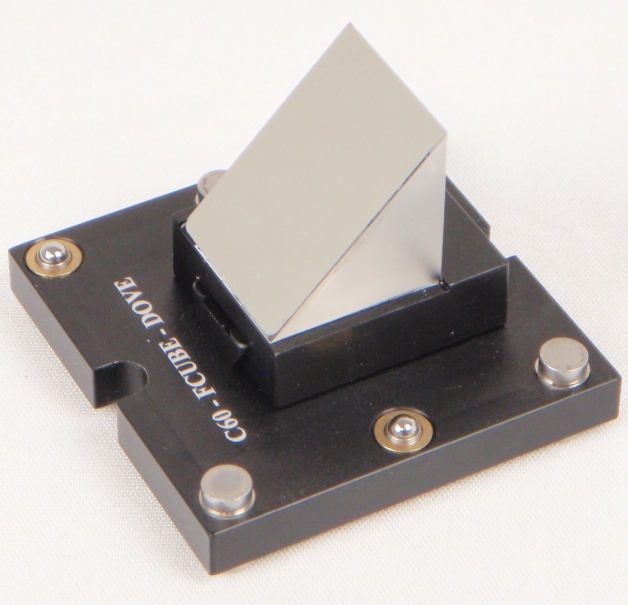 Figure 23: Right angle mirror installed on dovetail mount.
How to adjust the mirror cubes
The kinematic adjusters are used during alignment to tilt the mirrors in the MIM-CUBE-II ’s, both for camera mirrors and dichroic mirrors. You will have best results if you follow these steps.
- Loosen the thumb screws several turns. Do not manipulate the adjustment screws while the thumb screws are engaged; doing so can strip the adjustment screws.
- Grasp the cube body a apply modest pressure to the center of the adjustable face with your thumb to firmly push the kinematic adjusters into their seats. See Figure [fig:Beam-steering-adjusters.]. You may need to tighten the screws slightly so that the adjustment screws “catch”.
- Turn the three adjustment screws as necessary to steer the mirror using a 3/32” Allen driver.
- When where desired, lightly snug down the thumb screws and only then release your pressure on the cube face. Slight movement may occur depending on the order and tightness in which you tighten the thumb screws, which can be taken advantage of to make tiny adjustments.